
Hello sew-friends! In today's post, we're diving deep on the subject color blocking in sewing. Color blocking is a fun and easy way to add contrast and personality to a garment or other sewn item. It's also a great way to enhance existing style lines or add new style lines to a garment. Color blocking is easy enough for beginners to tackle and a great way to use up smaller cuts of fabric. In this post, I'll explain what color blocking is, why you might want to do it and a few methods for color blocking your handmade garments and other sewing projects.

WHAT IS COLOR BLOCKING?
Color blocking is simply using two or more fabrics in one garment. In most cases, the garment will be divided into two sections along a straight line, where one side uses color "A" and the other uses color "B". Using multiple colors of fabric in one piece creates blocks of color, hence the name "color blocking". When color blocking a garment, you can use existing seam lines or create new seam lines. For example, raglan t-shirts often feature color blocking with the front and back bodies of the shirt in one color and the sleeves in a different color. (Think the classic baseball tee.)
REASONS TO COLOR BLOCK
One reason to incorporate color blocking into a garment is add visual interest. For example, in the dress shown above (blogged here), I used a chartreuse green for the top of the dress and a silver gray for the bottom. Visually, the two colors have a lot of contrast and it makes a more interesting dress than it would be if it was made out of only one color of fabric.
Another great reason to color block is to use up scraps of fabric leftover from other projects. Sometimes, you won’t have enough fabric for a whole garment using one fabric but if you add in a second fabric, you might have enough to complete the project. You can even be strategic with your color blocking design in order to use the fabric you have on hand.

TIPS FOR COLOR BLOCKING
Sketch your design before altering the pattern or cutting fabric. It’s important to find the right proportion when color blocking. To test it out before you cut your fabric, use a copy of the pattern line drawing and tracing paper to sketch your design.
Don't forget to add seam allowance to all new seam lines.
-
Use similar weight fabrics
If you are using fabrics of different weight, consider using the lighter fabric on the bottom, for example in a peplum or gathered skirt. The reason I caution against using a light weight fabric on the top of the garment and a heavy fabric on the bottom is due to gravity. The heavy fabric will pull more on the lighter (and likely weaker) fabric.
Use fabrics that can be washed using the same method.
Avoid adding style lines that end where multiple seam lines meet (like at the bottom of an armhole/armscye). This will make it a little more difficult to sew together and will add more bulk to that area.
HOW TO COLOR BLOCK USING EXISTING STYLE LINES
If you are new to sewing or nervous to hack up your pattern, then you can start out color blocking by using the existing style lines of a pattern. With this approach, you'll select a pattern, like a raglan top or my Ali Sweatshirt pattern, that has sections that lend themselves to color blocking. For example, you can make a raglan t-shirt and use a contrasting fabric for the sleeves and neck band. Or, with my Ali Sweatshirt pattern, the back yoke and kangaroo pocket a great places to add a different color fabric.
To do this, you simply cut that particular pattern piece (for example, the sleeves or the yoke) from a different color of fabric. Then construct as normal. If the pattern uses topstitching, you can also play around with different colors of thread for different sections of the garment.
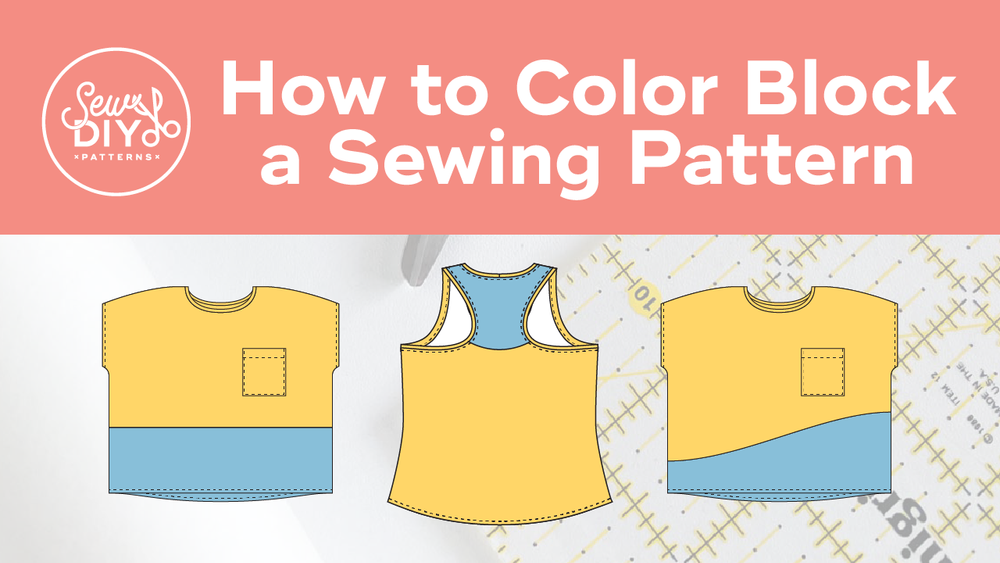
In the video above, I share why you would want to color block a sewing pattern. I discuss the two approaches to color blocking and demonstrate three different ways to color block a garment. Scroll down for diagrams and if the video above isn’t working, you can also watch on YouTube.
TIME STAMPS
00:22 What is color blocking
00:39 Color blocking along existing seam lines
1:21 Reasons to color block
2:42 Color blocking along new seam lines
3:47 Demo: How to color block a straight line
6:04 Demo: How to color block an asymmetrical curved line
8:47 Demo: How to color block across a seam line
11:20 Tips for color blocking
PATTERNS MENTIONED/USED IN THIS VIDEO
✂️ Lou Box Top
If you’d like to get the pdf with 101 Ideas for Using Fabric Scraps that I mention in the video, the sign up form is below. When you sign up, you’ll receive an email pretty much immediately with the pdf. After that you’ll receive four more emails, once a day, with more tips and advice for sewing more sustainably. You can unsubscribe at any time at the bottom of the email and your email will never be sold.
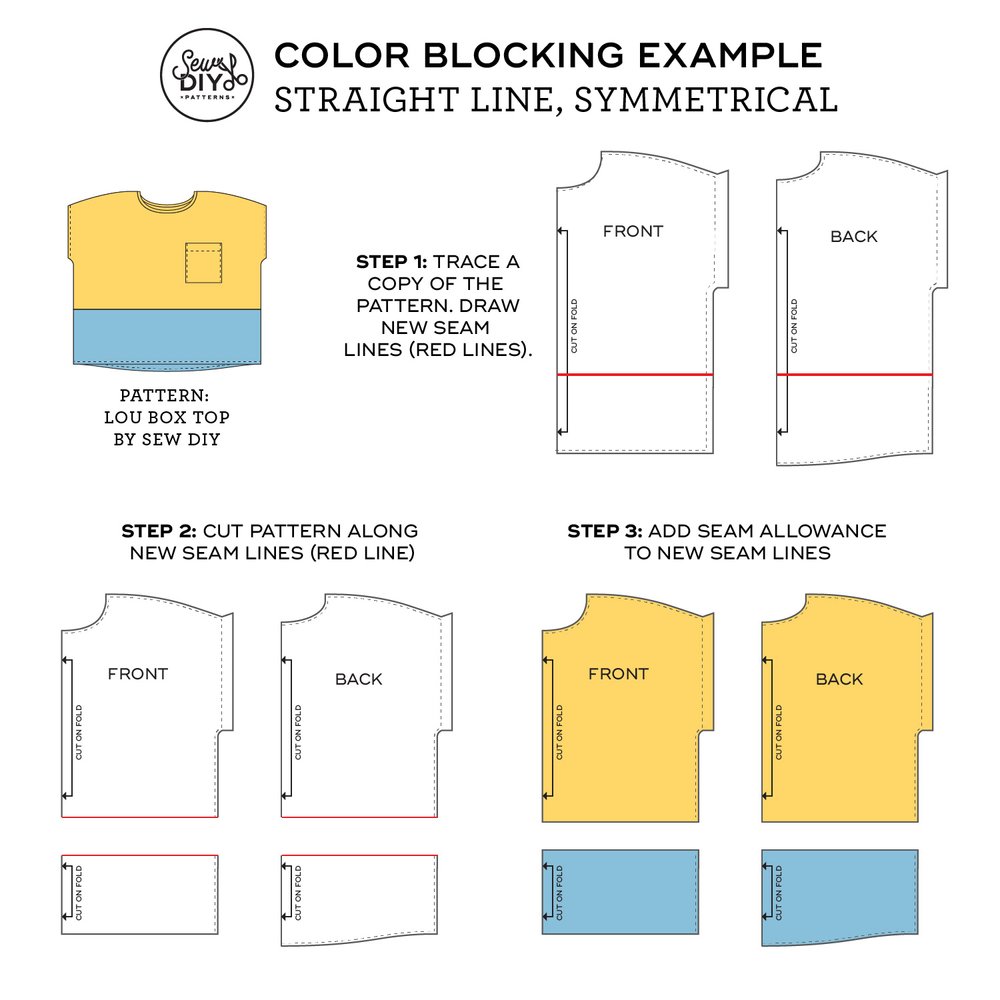
HOW TO COLOR BLOCK A STRAIGHT SYMMETRICAL LINE — EXAMPLE 1
Example pattern: Lou Box Top
STEP 0: Use the line drawing of the pattern to sketch your ideas. Experiment with the proportions to find the look you prefer.
STEP 1: Trace a copy of your pattern. Draw the new seam lines on the traced pattern.
STEP 2: Cut along the new seam lines.
STEP 3: Add seam allowance to all the new seam lines that you just cut. To do this, tape a piece of paper to the cut edge. Use a ruler to draw a line the seam allowance distance away from the seam line. Trim any excess paper.
When you sew the garment together, you will usually start by sewing along the new seam lines first. Then you can proceed with the garment construction as usual.
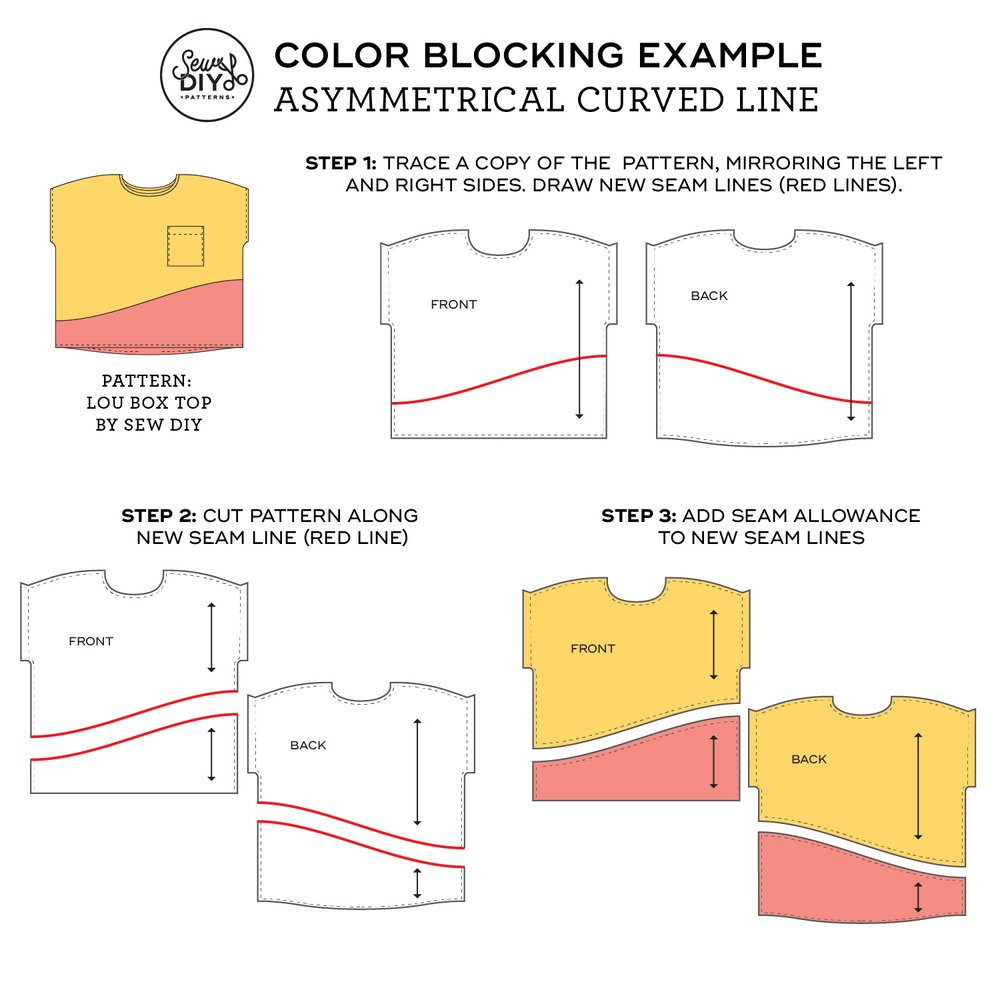
HOW TO COLOR BLOCK A CURVED ASYMMETRICAL LINE — EXAMPLE 2
Example pattern: Lou Box Top
STEP 0: Use the line drawing of the pattern to sketch your ideas. Experiment with the proportions to find the look you prefer.
STEP 1: Trace a copy of your pattern, mirroring the left and right side. Draw the new seam lines on the traced pattern. (TIP: To copy the curve on the front to the back, cut along the curve on the front. Then flip the pattern piece over and trace the cut edge onto the back.)
STEP 2: Cut along the new seam line.
STEP 3: Add seam allowance to all the new seam lines that you cut. To do this, tape a piece of paper to the cut edge. Then, use a ruler to mark the seam allowance at 1” intervals along the curved edge. Connect the dots to create the new cut line. Trim any excess paper. Add notches to the curved line, if desired.
When you sew the garment together, you will usually start by sewing along the new seam lines first. When you pin together the curved seam, be aware that that the cut edges may not be of equal length. The seam lines are equal though and that’s what’s important. Next, you can proceed with the garment construction as usual.
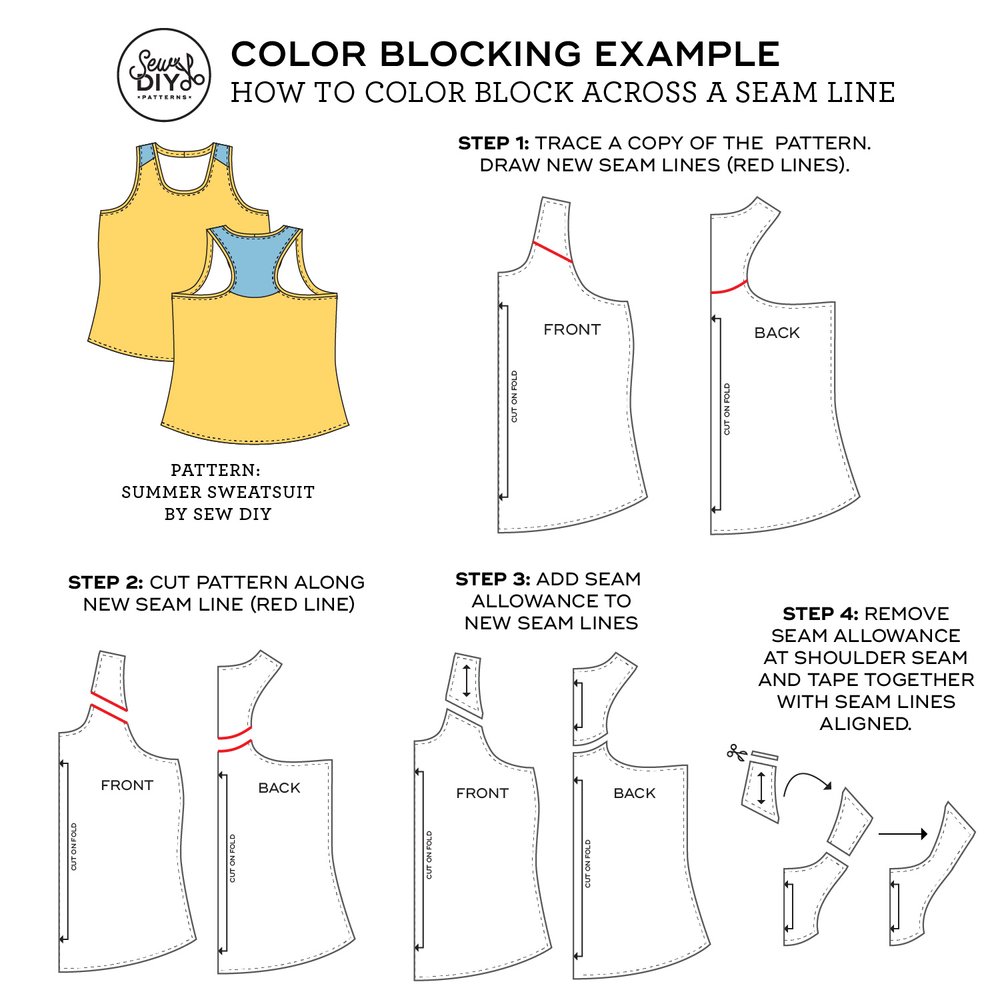
HOW TO COLOR BLOCK ACROSS A SEAM LINE — EXAMPLE 3
Example pattern: Summer Sweatsuit
STEP 0: Use the line drawing of the pattern to sketch your ideas. Experiment with the proportions to find the look you prefer.
STEP 1: Trace a copy of your pattern. Draw the new seam lines on the traced pattern.
STEP 2: Cut along the new seam lines.
STEP 3: Add seam allowance to all the new seam lines that you just cut. To do this, tape a piece of paper to the cut edge. Use a ruler to draw a line the seam allowance distance away from the seam line. Trim any excess paper.
STEP 4: To eliminate the shoulder seam, cut away the seam allowance from the shoulder. Align the seam lines at the shoulder and tape together. (Note, you will probably need to draw the seam lines onto your pattern.)
For this example, you will skip sewing the shoulder seam and proceed with the new seam lines created. Then you can construct the garment as usual.
NOTE: It’s easiest to eliminate seam lines that are straight and not curved. Curved seam lines are usually curved in order to create a certain fit to the garment (like a dart does). So, eliminating them would also change how the garment fits the body.
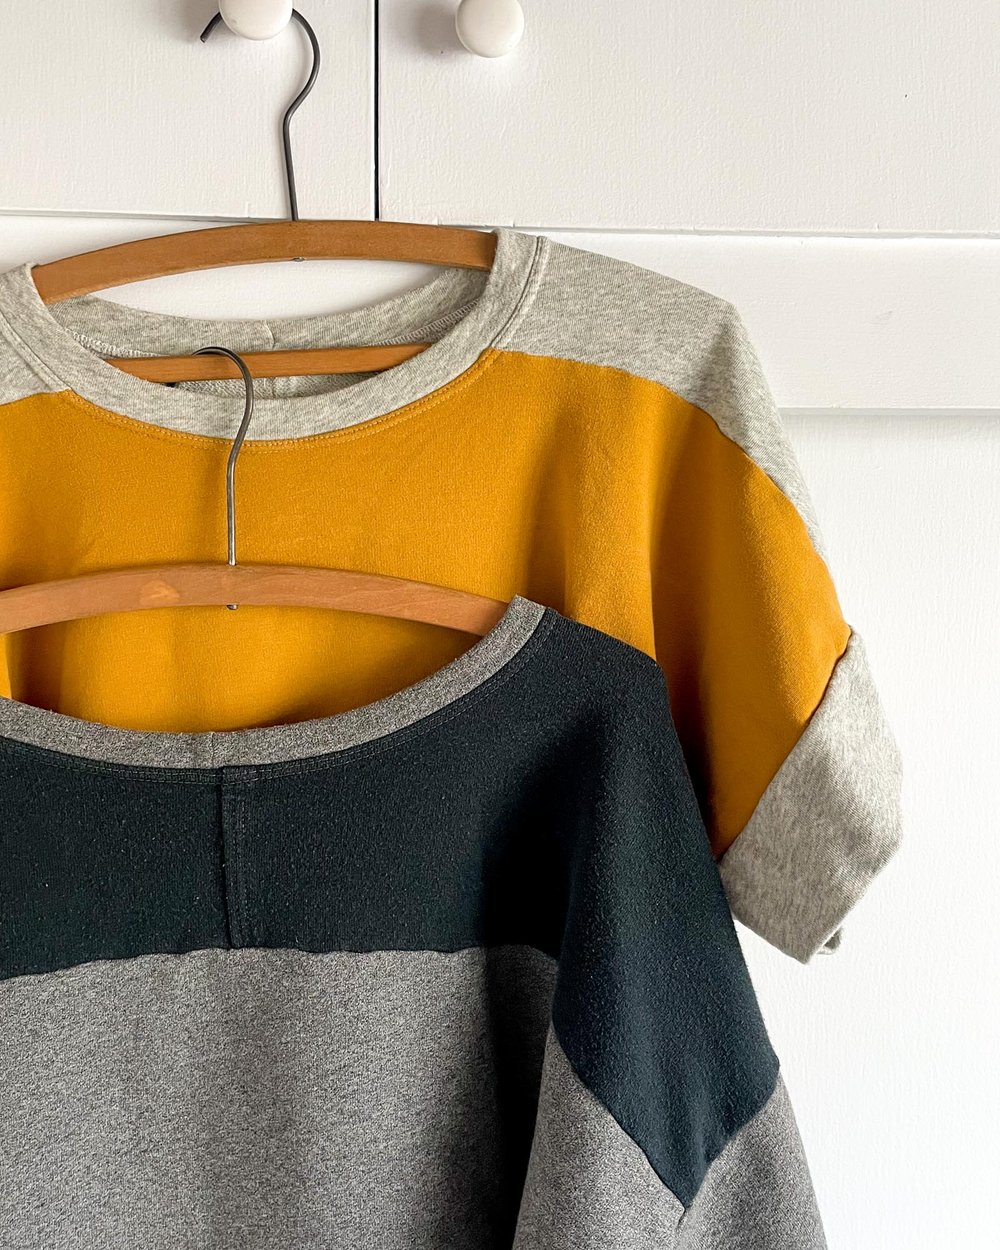
I hope that you enjoyed this post. Color blocking is a really fun way to personalize your sewing projects and use up smaller cuts of fabric. Plus, it’s a great way to dip your toes into pattern drafting and alteration. Happy sewing!
