

Decorate your Christmas tree with the help of these detailed instructions, tips and tricks geared toward the total newbie non-decorator. Follow the formula and you’ll be able to make your tree look like it was decorated by the pros.
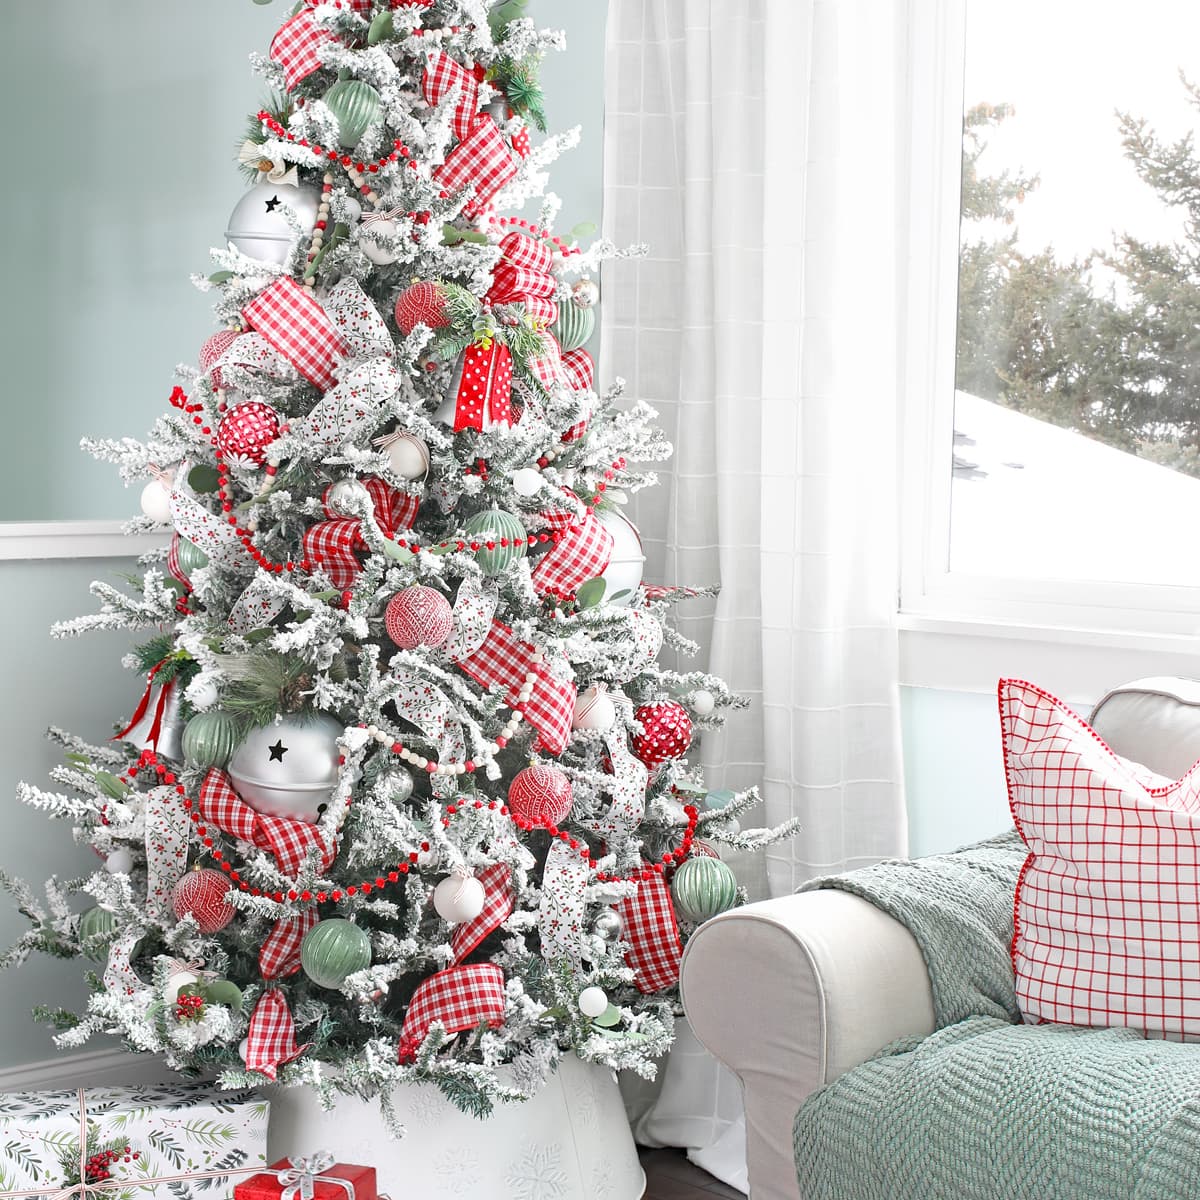
I’ve been asked dozens of times if I had a tutorial for how I do my Christmas trees and every year I mean to write this post, then I don’t. Haha. This year I decided it was time to change that, and here we are!
I have learned a ton about Christmas tree decorating over the last few years. I have some practical tips and tricks to share! These general principles can be adapted to any style of tree with any combination of ribbon, garland, and ornaments. Seriously! I’ve thought a lot about the theory behind what makes a gorgeous Christmas tree, and I am ready to spill everything I’ve observed. Let’s do this!
Before you add a single decoration, spend plenty of time fluffing all the branches of your tree and string the lights or make sure the pre-strung lights work. These two tasks are boring, but they are critical!
Step 1: Add Garland
If you are going to add any kind of long garland to your tree, whether it be beaded garland, pom pom garland, a string of popcorn or anything else, this is the first step. I have found I get better results if I don’t wrap it in a spiral all the way around the tree. Instead, I place it in a zig zag pattern along one area, then another until the whole tree is covered. I think it looks better and you don’t have to spin in circles around the tree hoping the garland doesn’t get tangled. IYKYK.
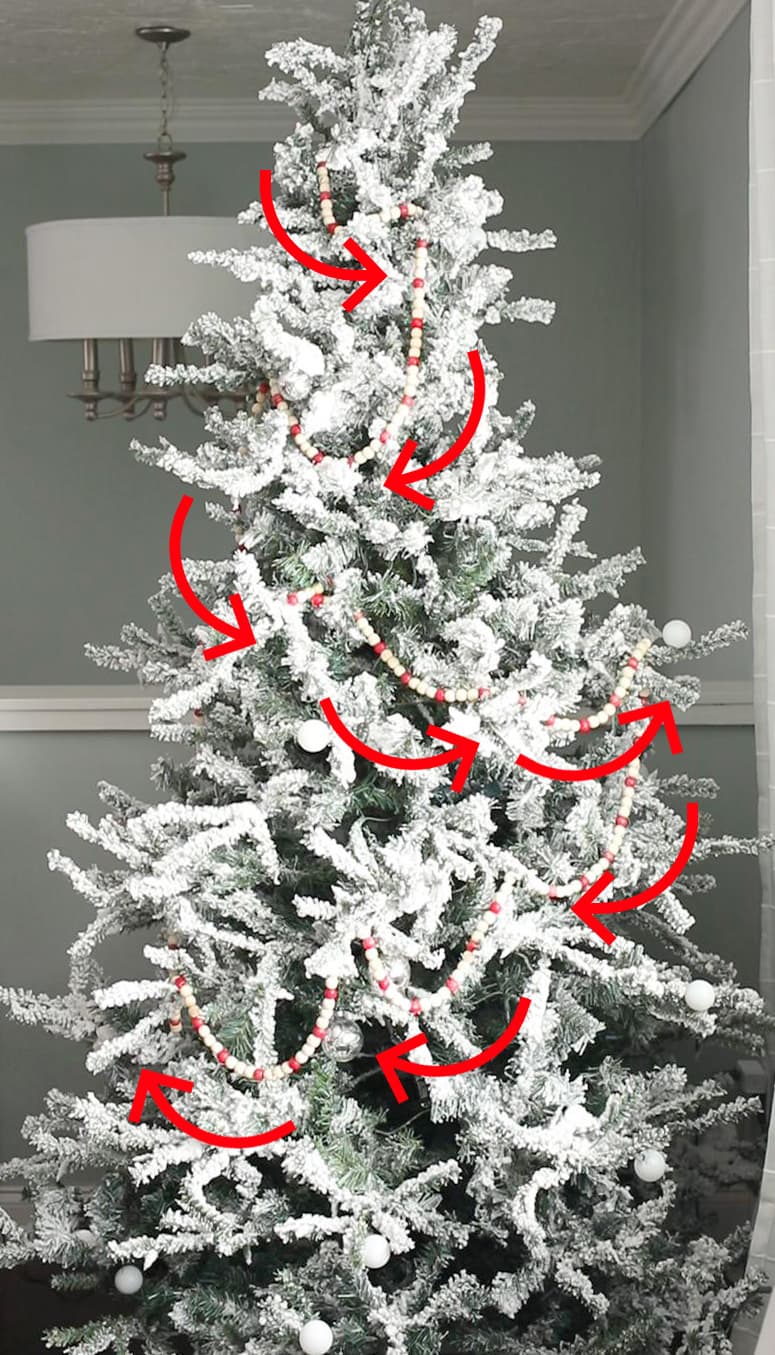
Note: Just like any design “rule” there are exceptions. If you have a garland that you want to be the star of the show, you may want to add it later. The first layer added should be the one you want deepest into the tree branches and anything you want on the outermost layers of the tree goes last.
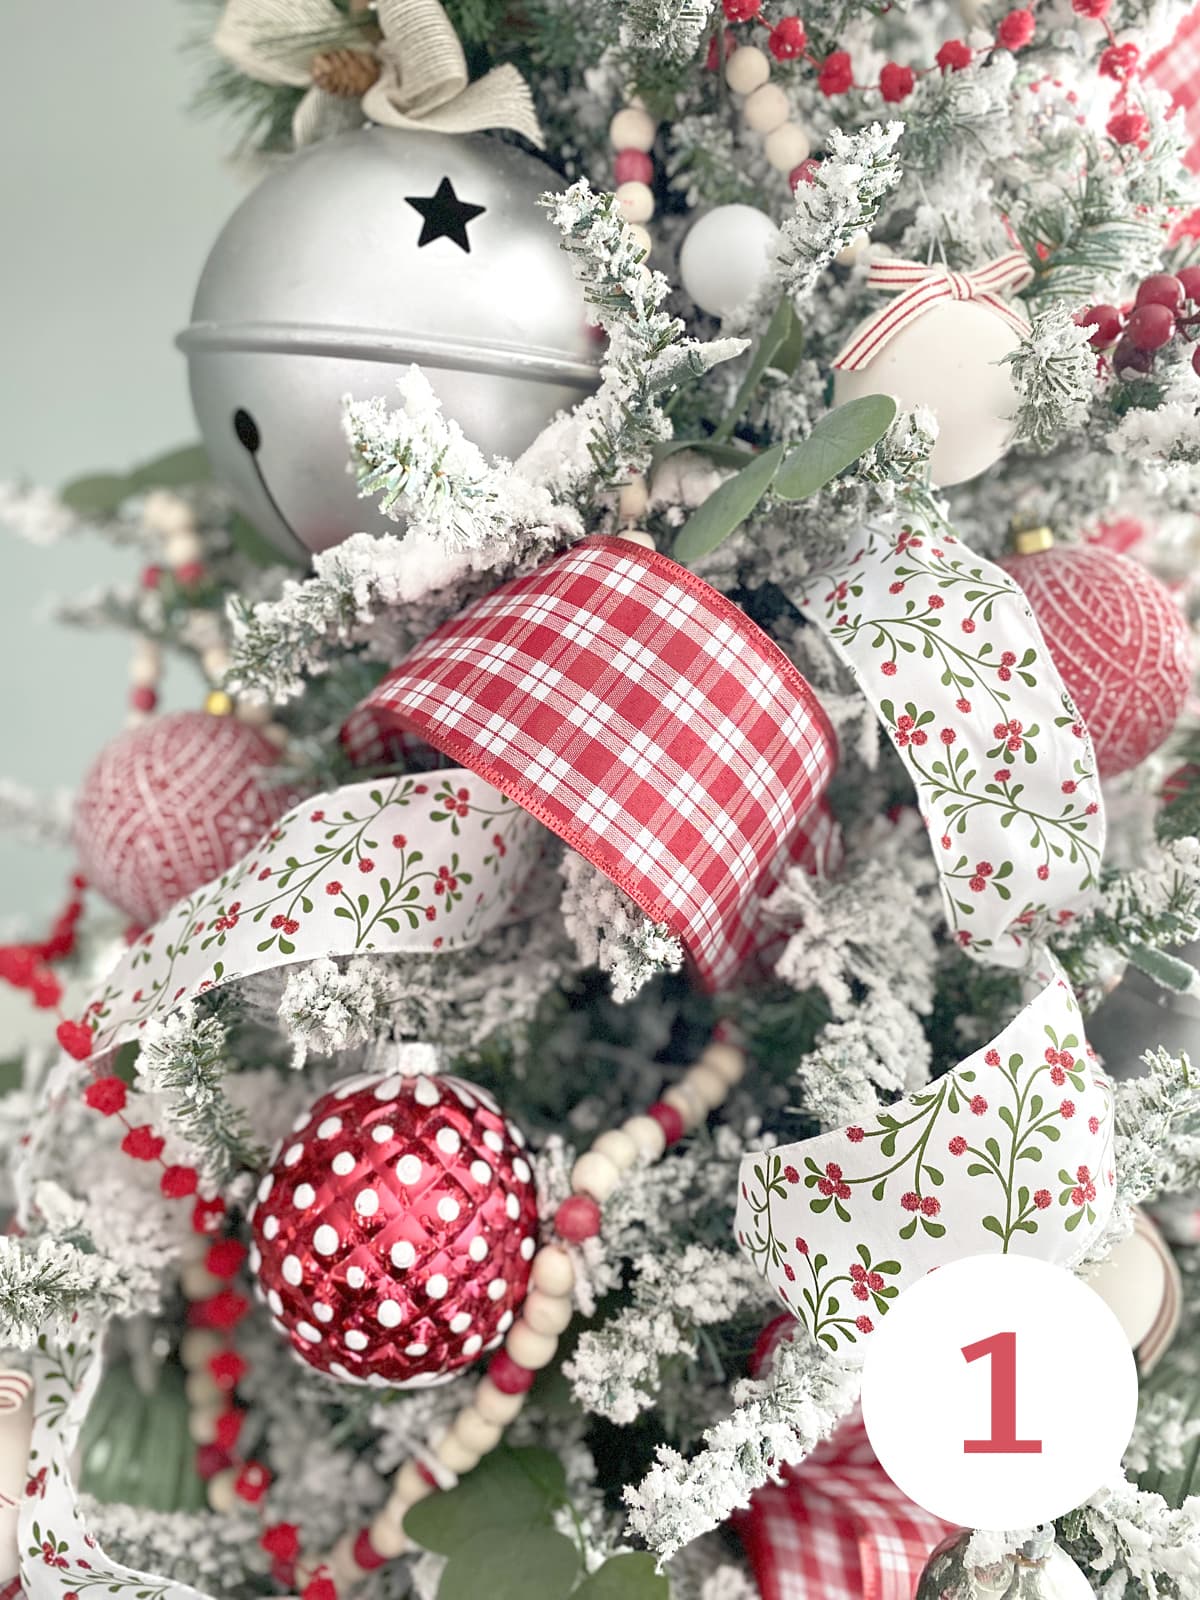
Step 2: Add Ribbon
From the feedback I’m getting from all of you, this seems to be the step that gives people the most trouble. And I agree!
The single thing that has helped me the most is realizing that you don’t have to just unwind a giant long roll of ribbon and wrap it around the tree in a single go. To me, that method looks like the tree is being strangled, creates too-harsh visual lines and plus it’s hard to do!
Instead, here are seven different techniques I like to use to add ribbon to a Christmas tree.
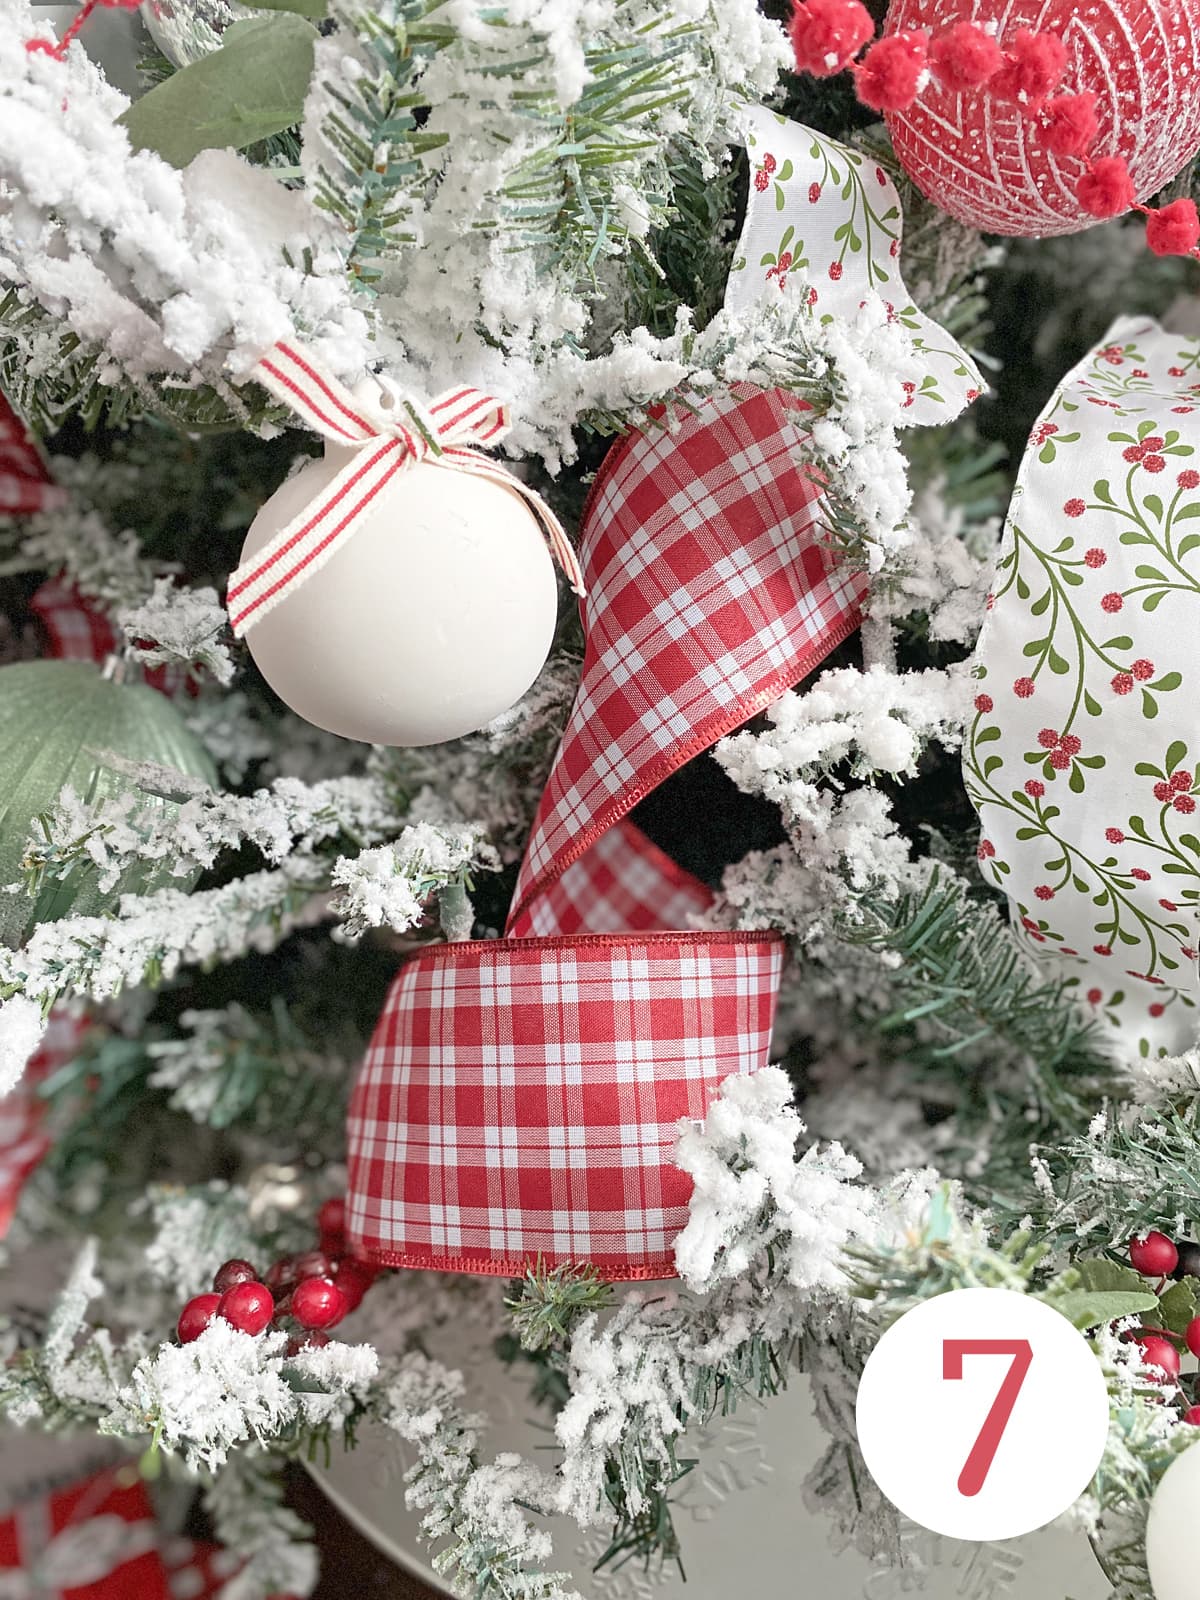
- Single Loop – Cut a small piece of ribbon roughly 18 inches long. Tuck one end deep into a tree branch, then let the ribbon form a nice loop and tuck the other end into another branch
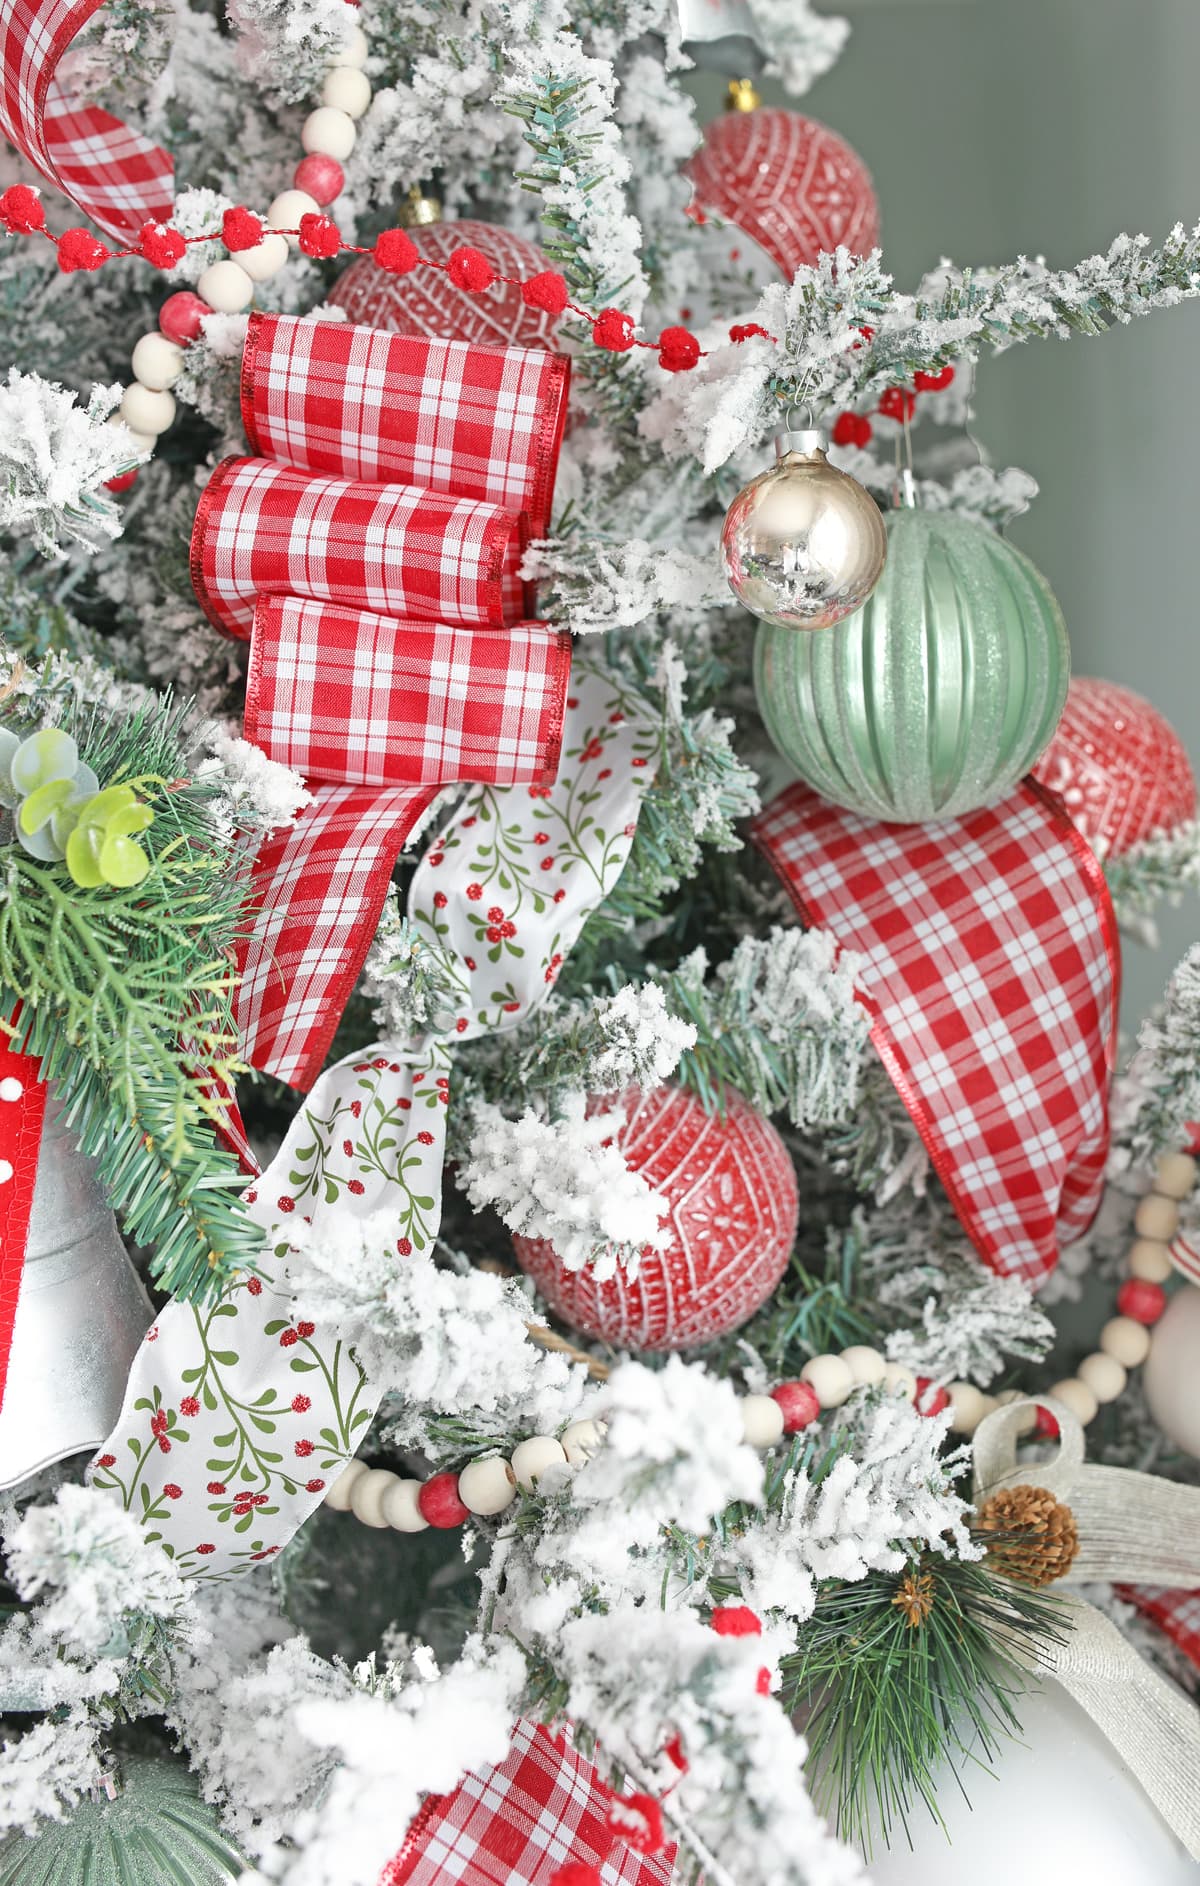
2. Twist & Tuck – Using a longer piece of ribbon (3 feet maybe?), tuck one end into the tree, loop it to another branch, twist the ribbon a full 360 degrees, tuck that part into the tree branch, then keep going until all the ribbon is placed. Look closely at the white ribbon in the photo. I made three loops.
3. Faux Bow – Make two or three loops of ribbon with a tail off one end and staple through the layers. Smoosh this into a hole in the Christmas tree, fluff it out and it looks like a fancy bow!

4. Single Loop with Tail – Cut a piece of ribbon about 24 inches long. Loop it the same way as in method number 1, but leave a tail sticking out for a bit of variety and extra cuteness.
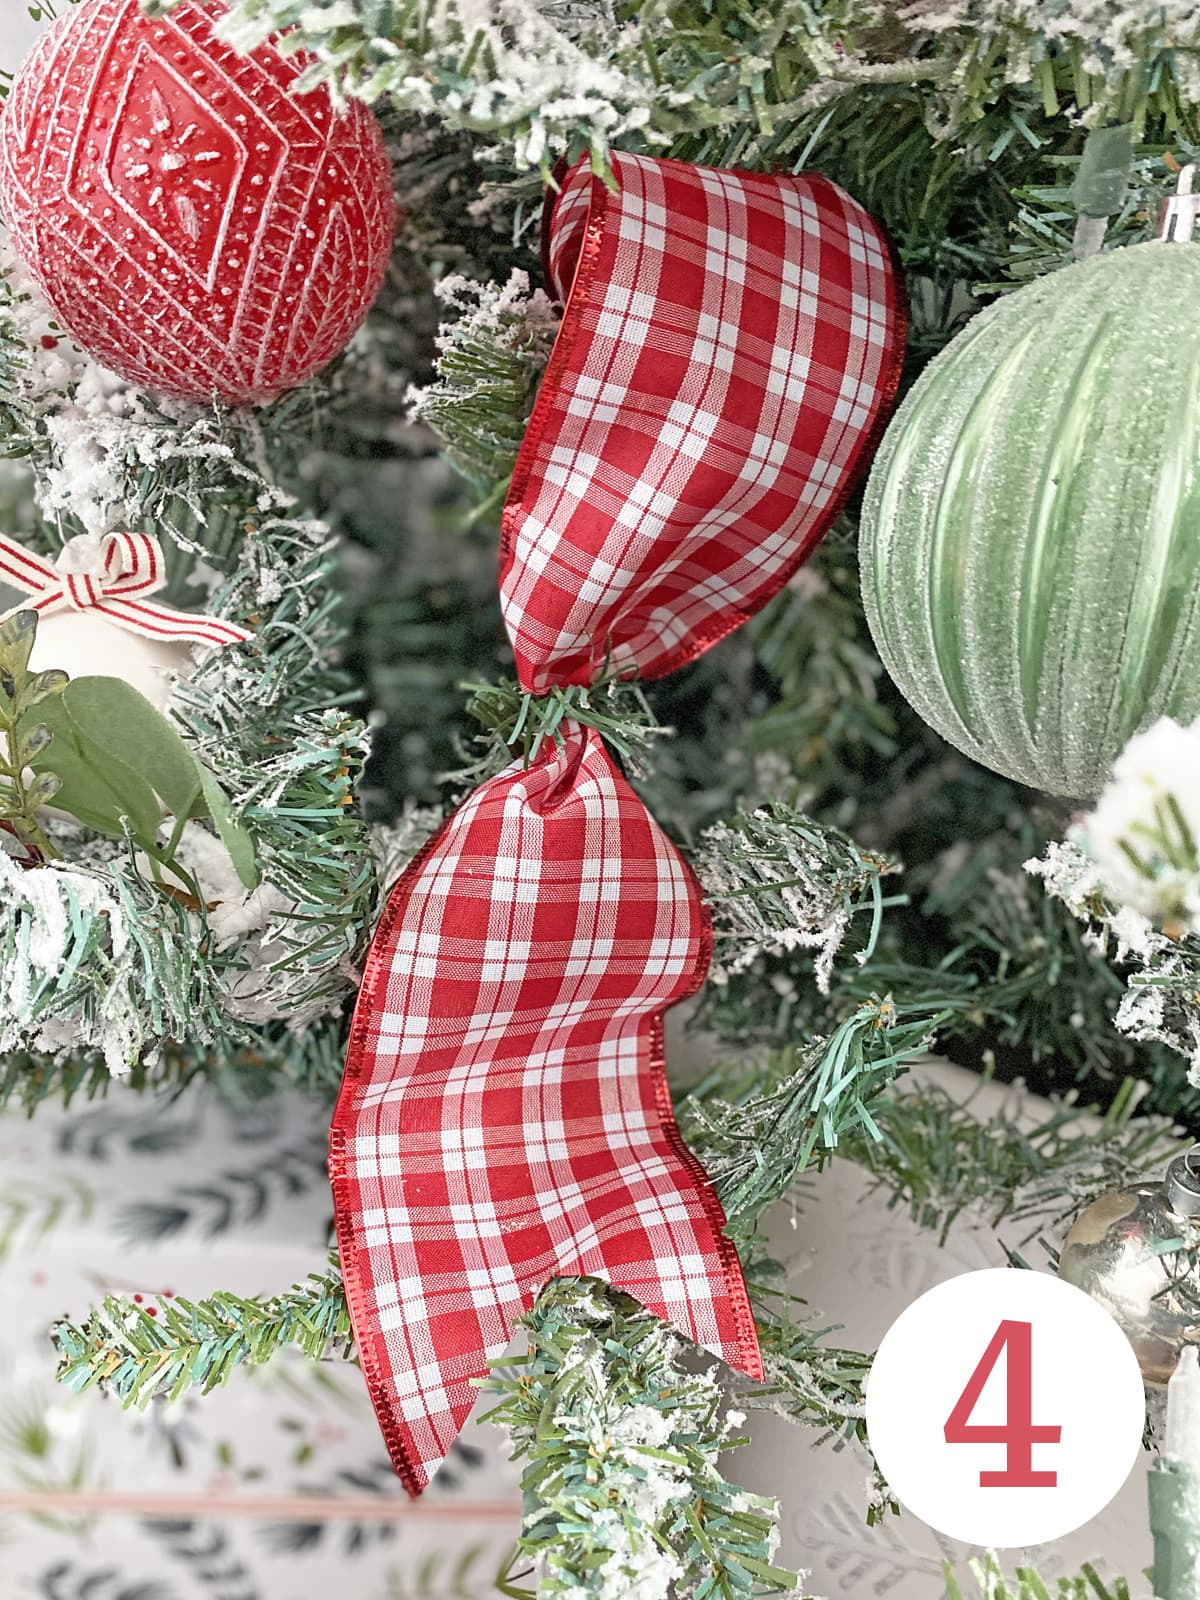
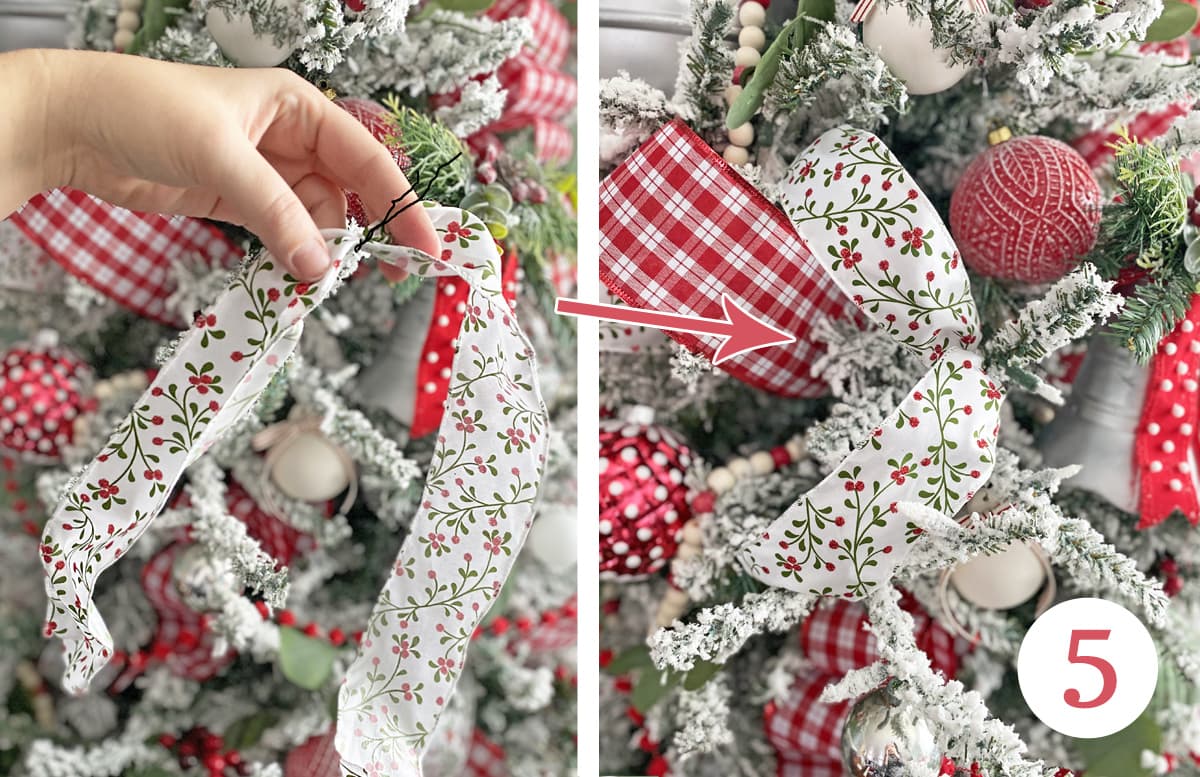
5. Florist Wire Twist – Sometimes ribbon just doesn’t want to stay where you want it to. This is when I pull out my secret weapon… florist wire. I explained all about this method in my garland decorating tutorial and it works really well for a Christmas tree too. Tie a piece of florist wire in the center of a ribbon, then tie the florist wire around a branch, tucking in the two loose ribbon ends into other branches. You may want to use this trick with method number 4 to keep the loop and tail looking fluffy.
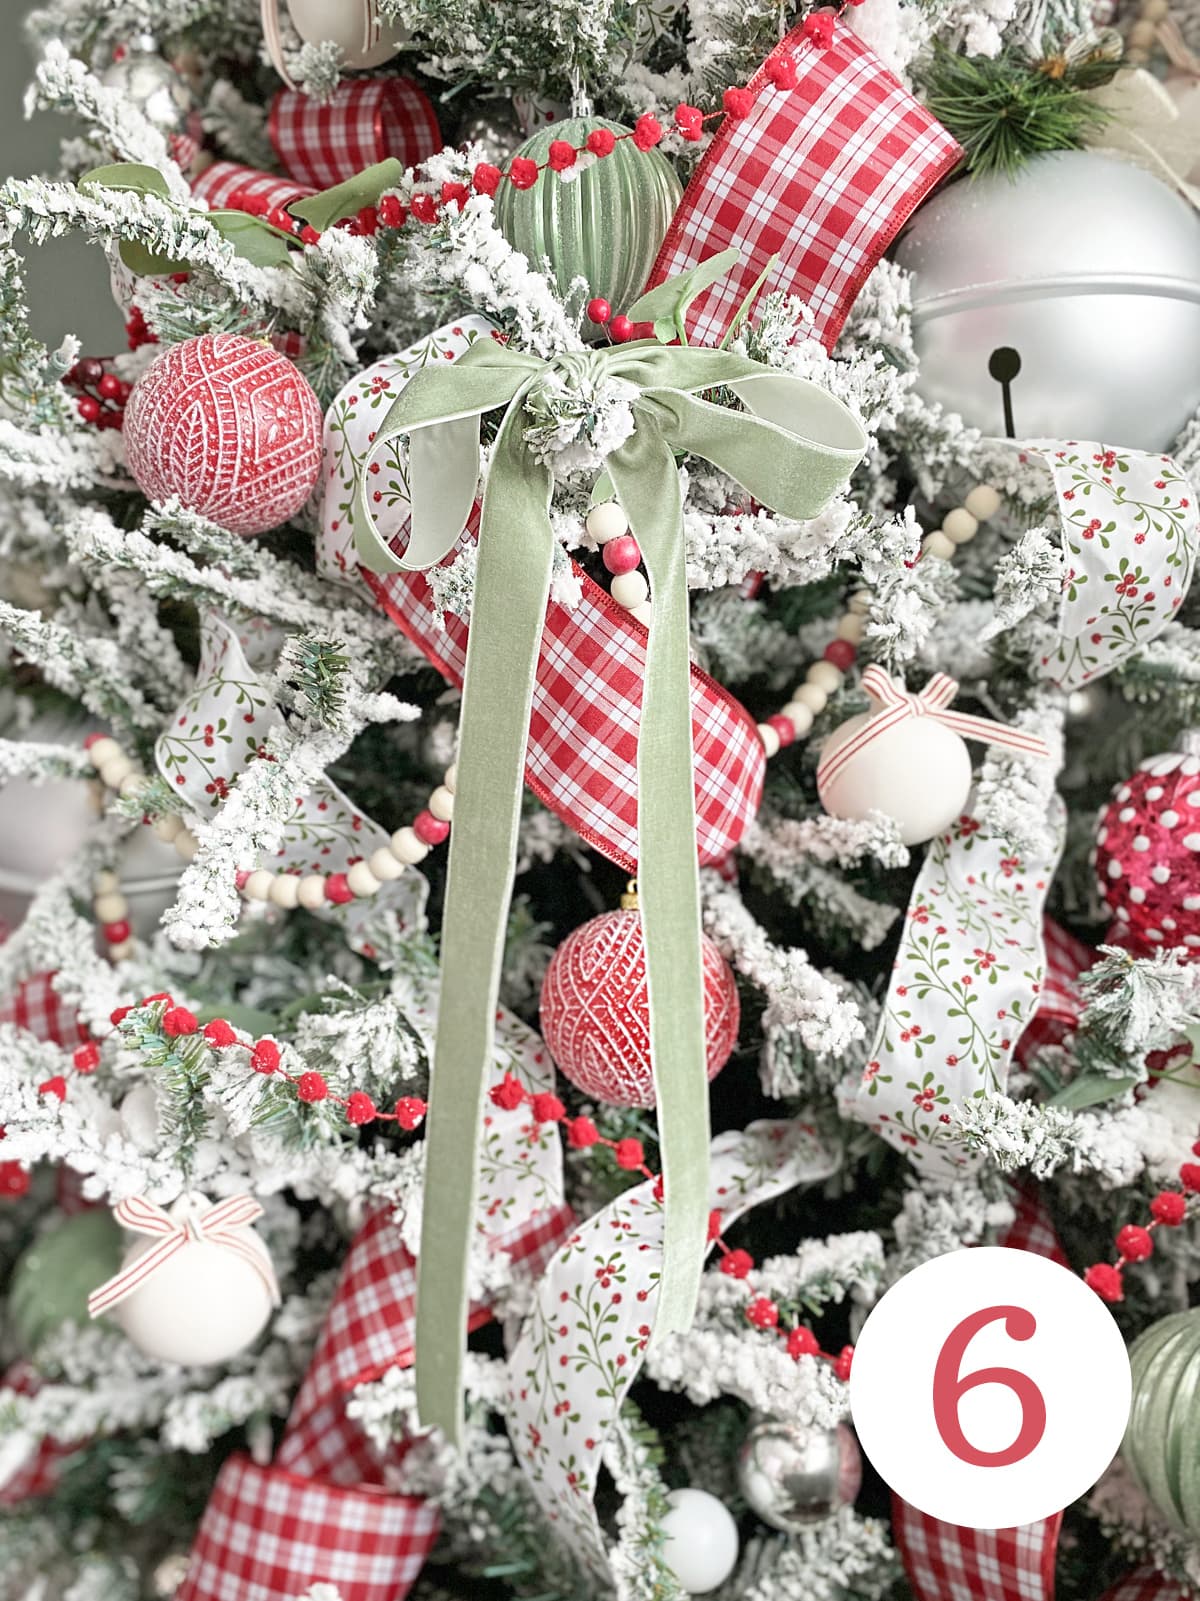
6. Droopy Bows – Tie a bow with long tails and either place it atop the tip of a tree branch or slip a piece of wire through the back of the knot and wire the bow into place. This look works best for thinner ribbon that does not have wired edges. Velvet ribbon, satin ribbon and grosgrain ribbon are all great choices for this look
7. The Curly Q – Do the Twist & Tuck method or the single loop method, but twirl the ribbon around before tucking it in to make it look like a curl.
You can see all of these different ribbon methods in action in the video at the bottom of this post.
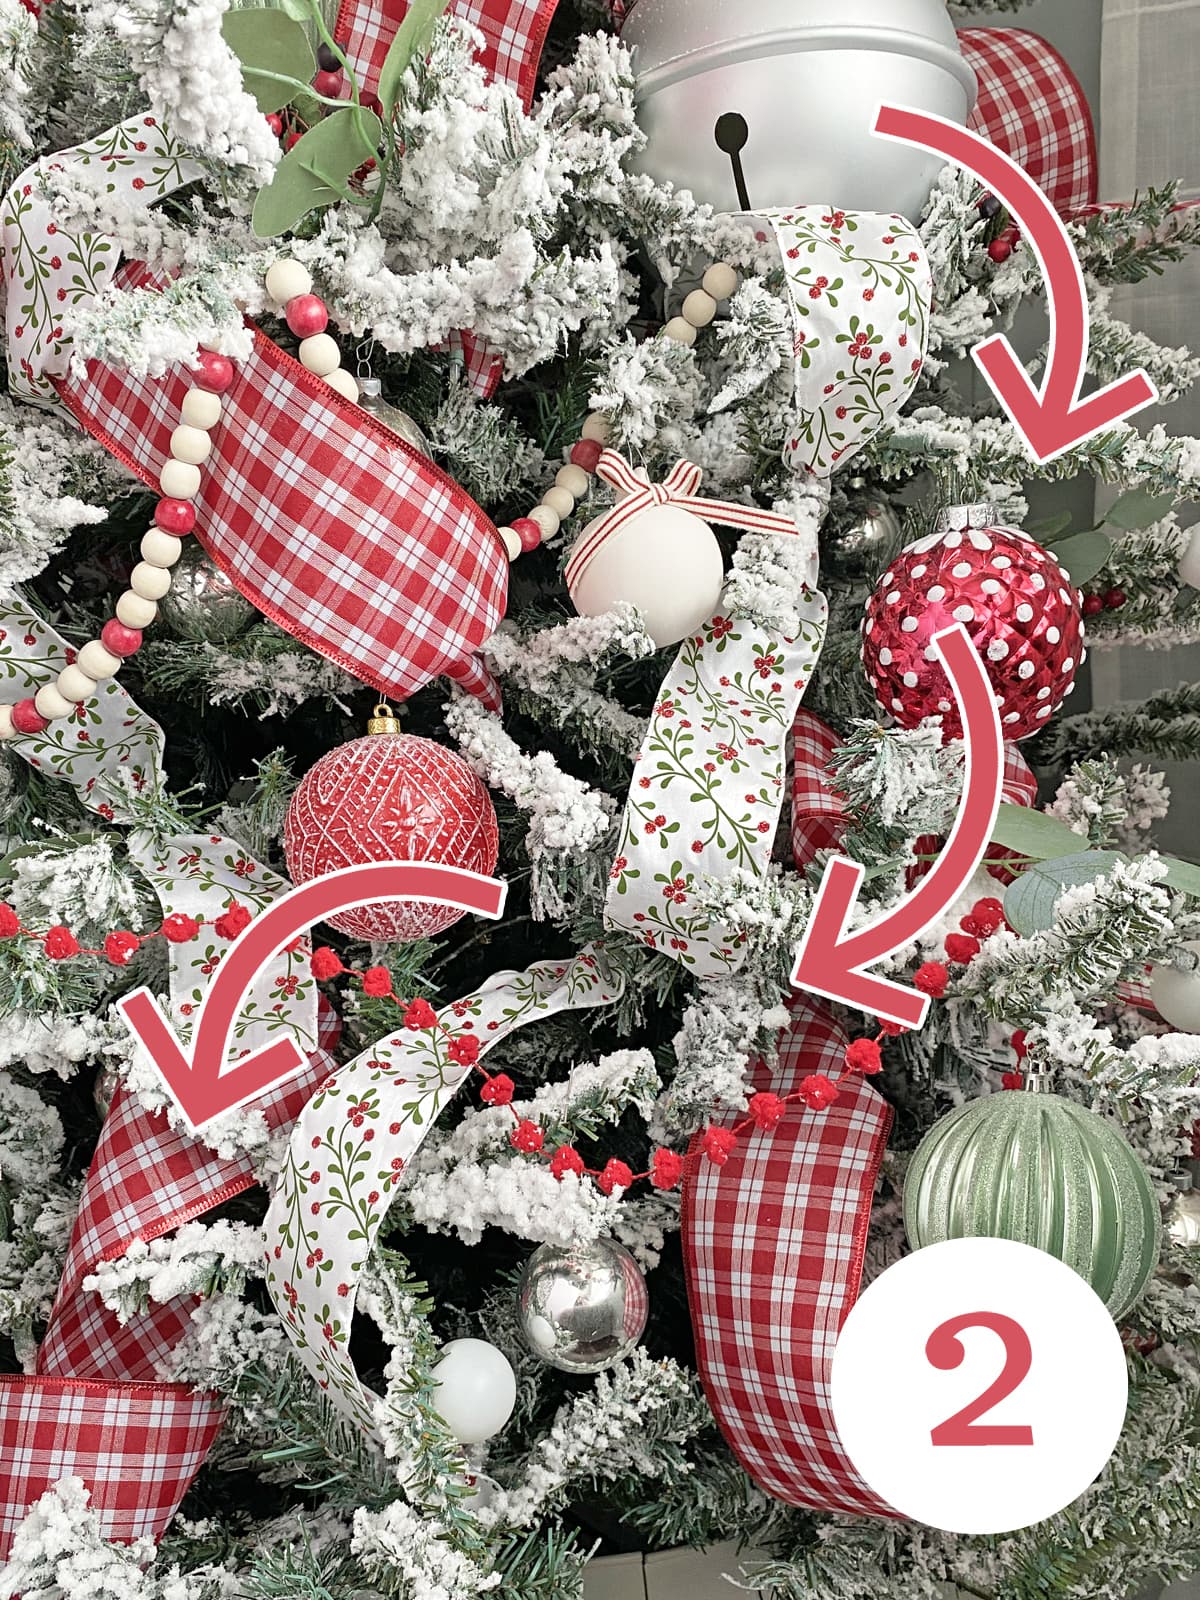
So now let’s talk about overall ribbon placement. Here’s the general shape you’re going for:
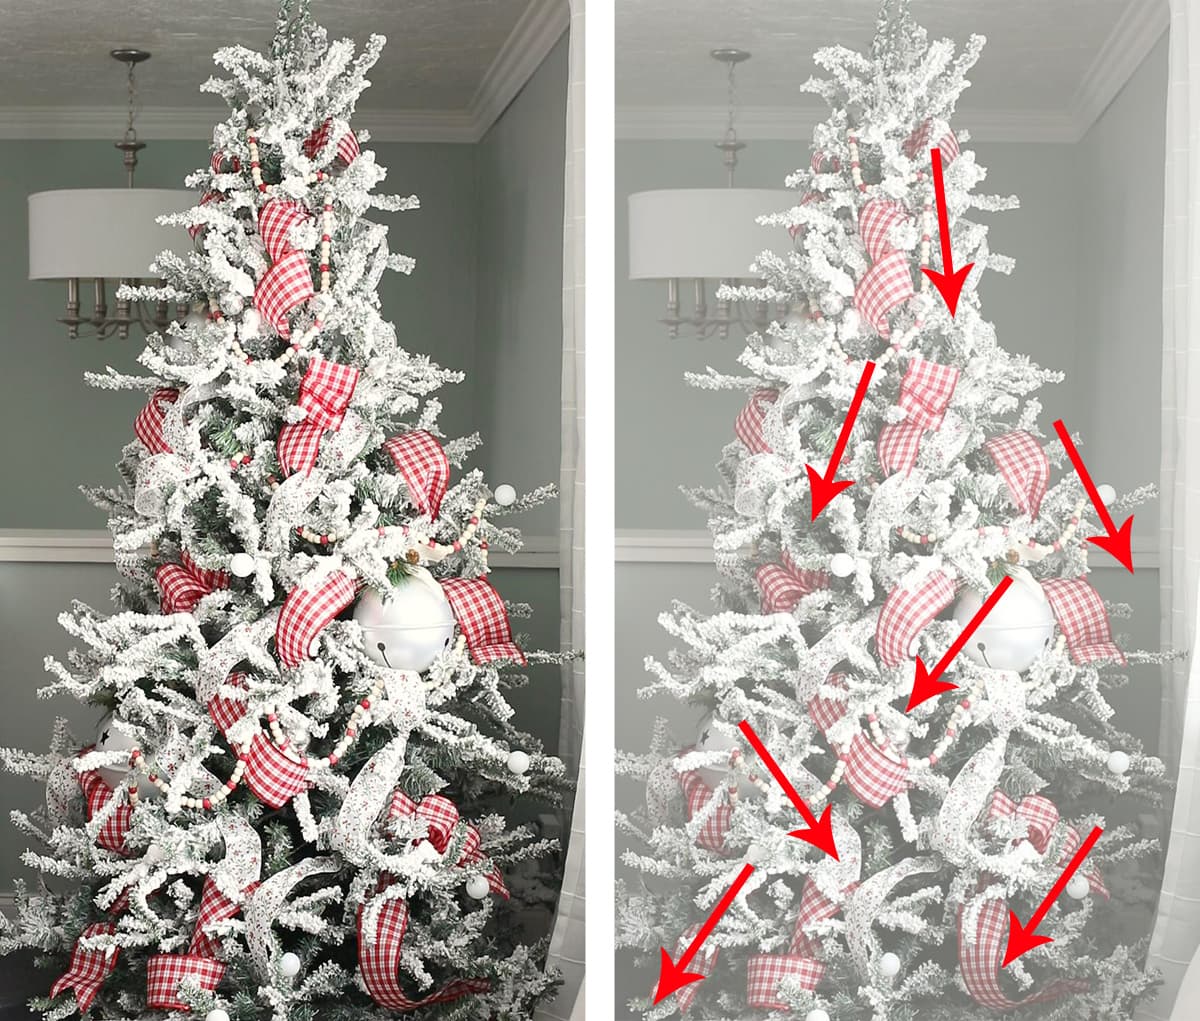
You’re going for lots of varying directions and staggering height and sort of making it look like organized randomness. Does that make sense? I used all of the different methods listed above except for the droopy bows. You can still use these methods if you want all of your ribbon to go in the same direction. That’s a cute look too!
Helpful Ribbon Tips
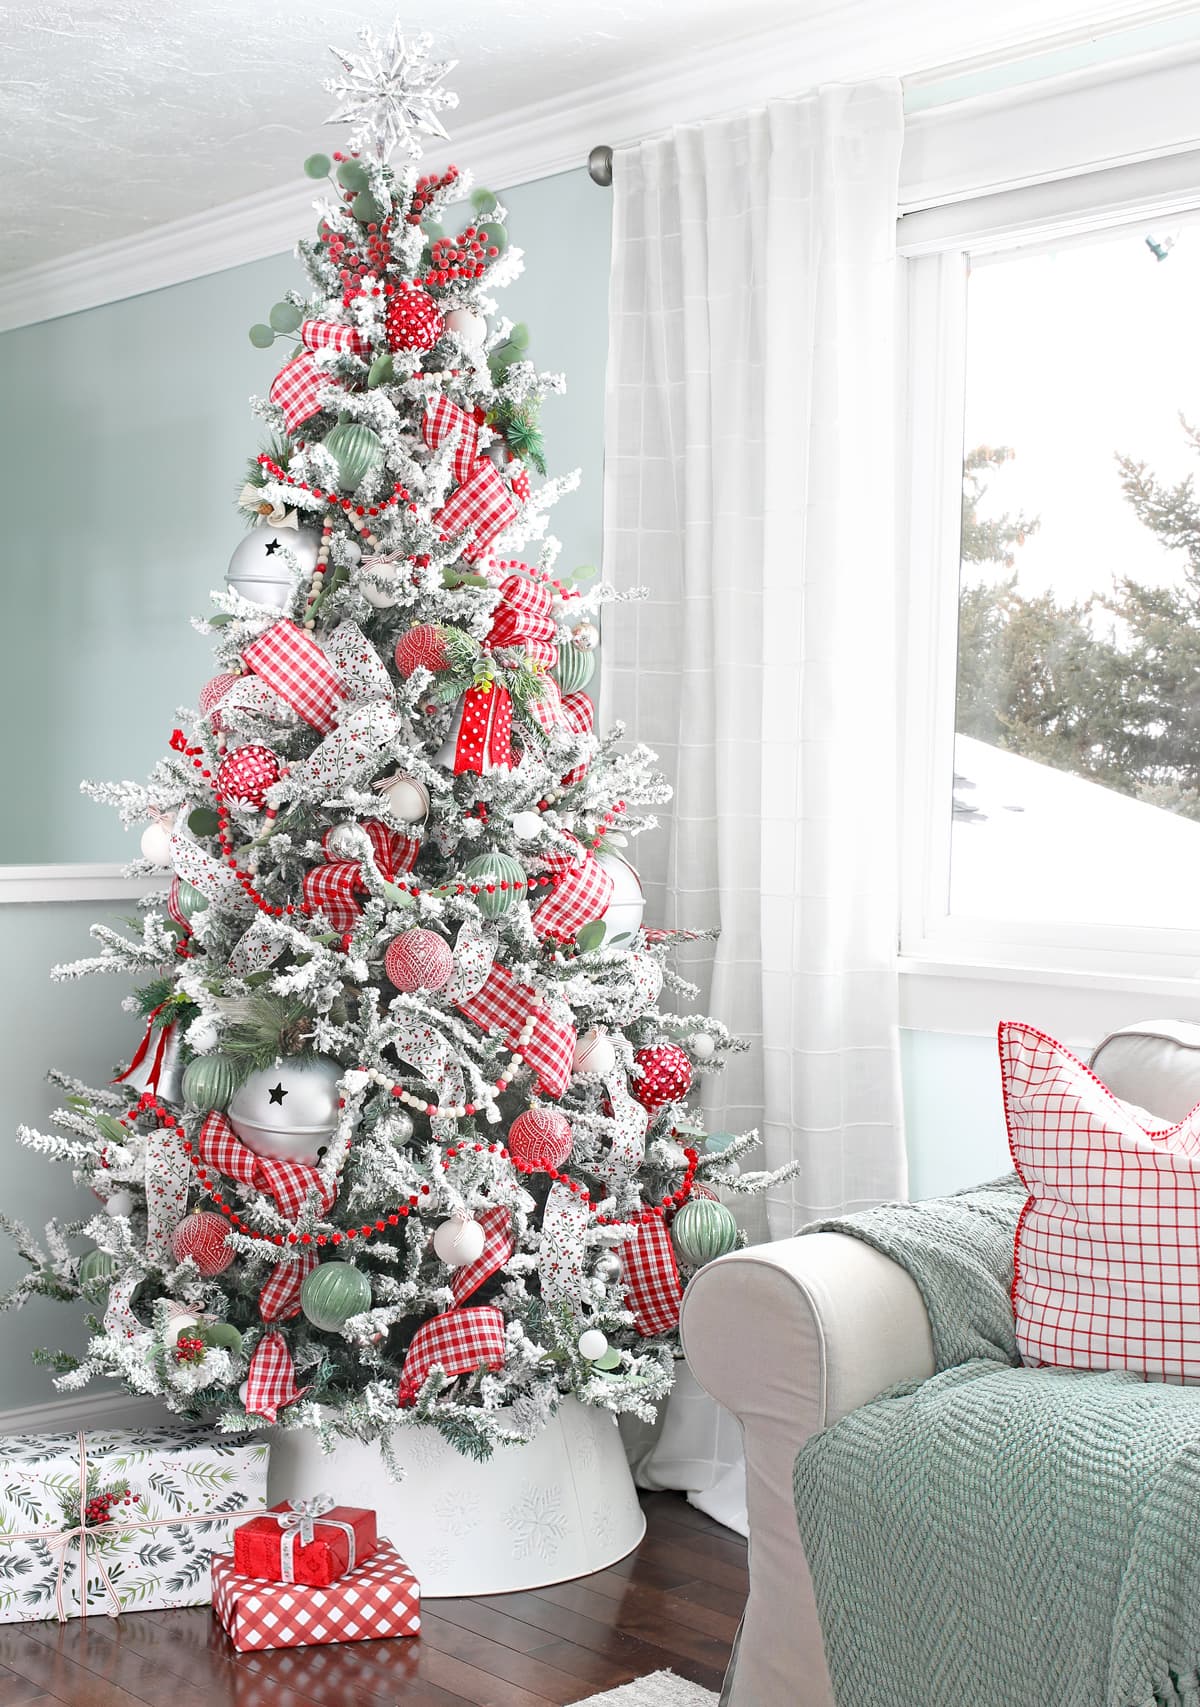
- Start with the boldest ribbon. This could be the thickest or the brightest color. Your eye will see this ribbon the most, so I like to add it first so I can place it just right. On the tree in the example photos, the thick, red gingham ribbon definitely catches your eye the most, so I placed it first.
- Wired ribbon makes the nicest curves, so I recommend using that for all of the methods listed above except the droopy bows.
- You will need more ribbon than you think you will need. I usually buy at least two big rolls of each type. You might be able to get away with less if your tree is against a wall or in a corner.
- Add two or more contrasting ribbons to the tree for more pizazz. Ribbon is usually the least expensive part of the tree, so it actually saves money to fill it out with ribbon instead of having to buy more ornaments.
- Let the ribbon do it’s thing. Most ribbon, especially wired ribbon that has been rolled on a spool tightly for months, wants to move a certain way. Go with it! You’ll get a more natural look and it’ll flow so nicely.
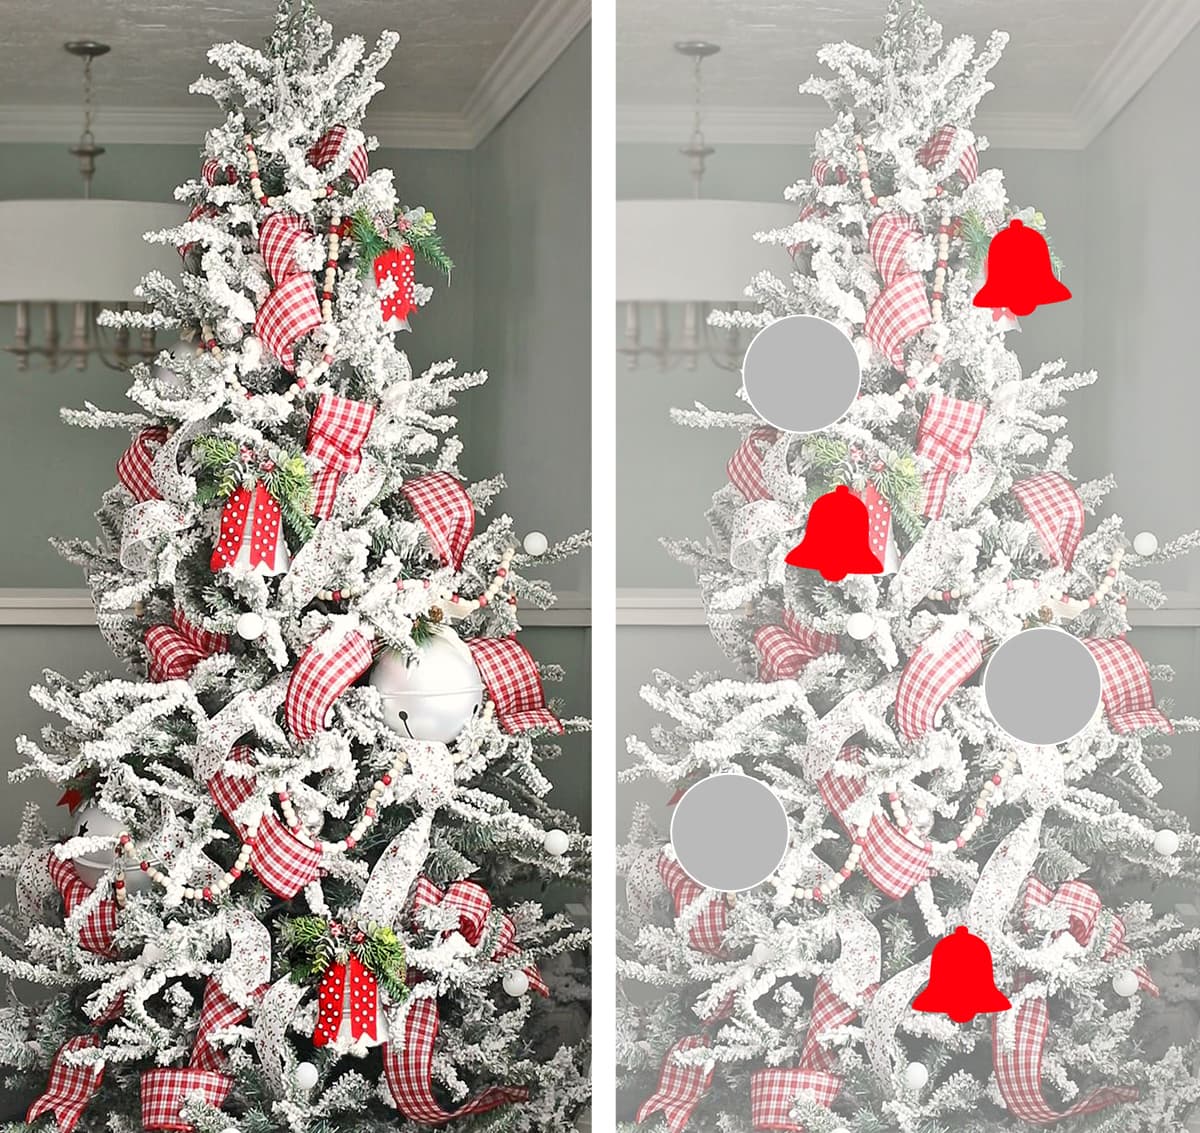
Step 3: Add Large Ornaments
The next step is to add your largest ornaments. On my tree, I have giant jingle bells and some smaller church bells and I only have three of each. I try to add them in a triangle pattern across the tree at different heights and nestle them deeply into the branches. I look for natural gaps in the branches and use the big ornaments to fill those in.
Step 4: Add Small Ornaments
This is where the tree really starts coming together. I like to use a variety of medium and small ornaments to add color and shimmer to my tree. The red ornaments are from Walmart, the green ones are from Hobby Lobby and the silver ornaments are all thrifted. This does not have to be expensive. I see great ornaments at thrift stores all the time, especially in the off-season. The trick to making them look good is to hang them at different depths. Place a few smaller ornaments right on the tips of the branches. Shove some ornaments way back into the tree, especially if they’re reflective. They’ll bounce the light around and add tons of depth to your tree.
I pretty much only have the big bells, then a bunch of ball ornaments. I think my tree would be enhanced if I had thrown in some different shaped ornaments… stars or little houses or snowflakes, etc. Just a thought for you to consider as you plan.
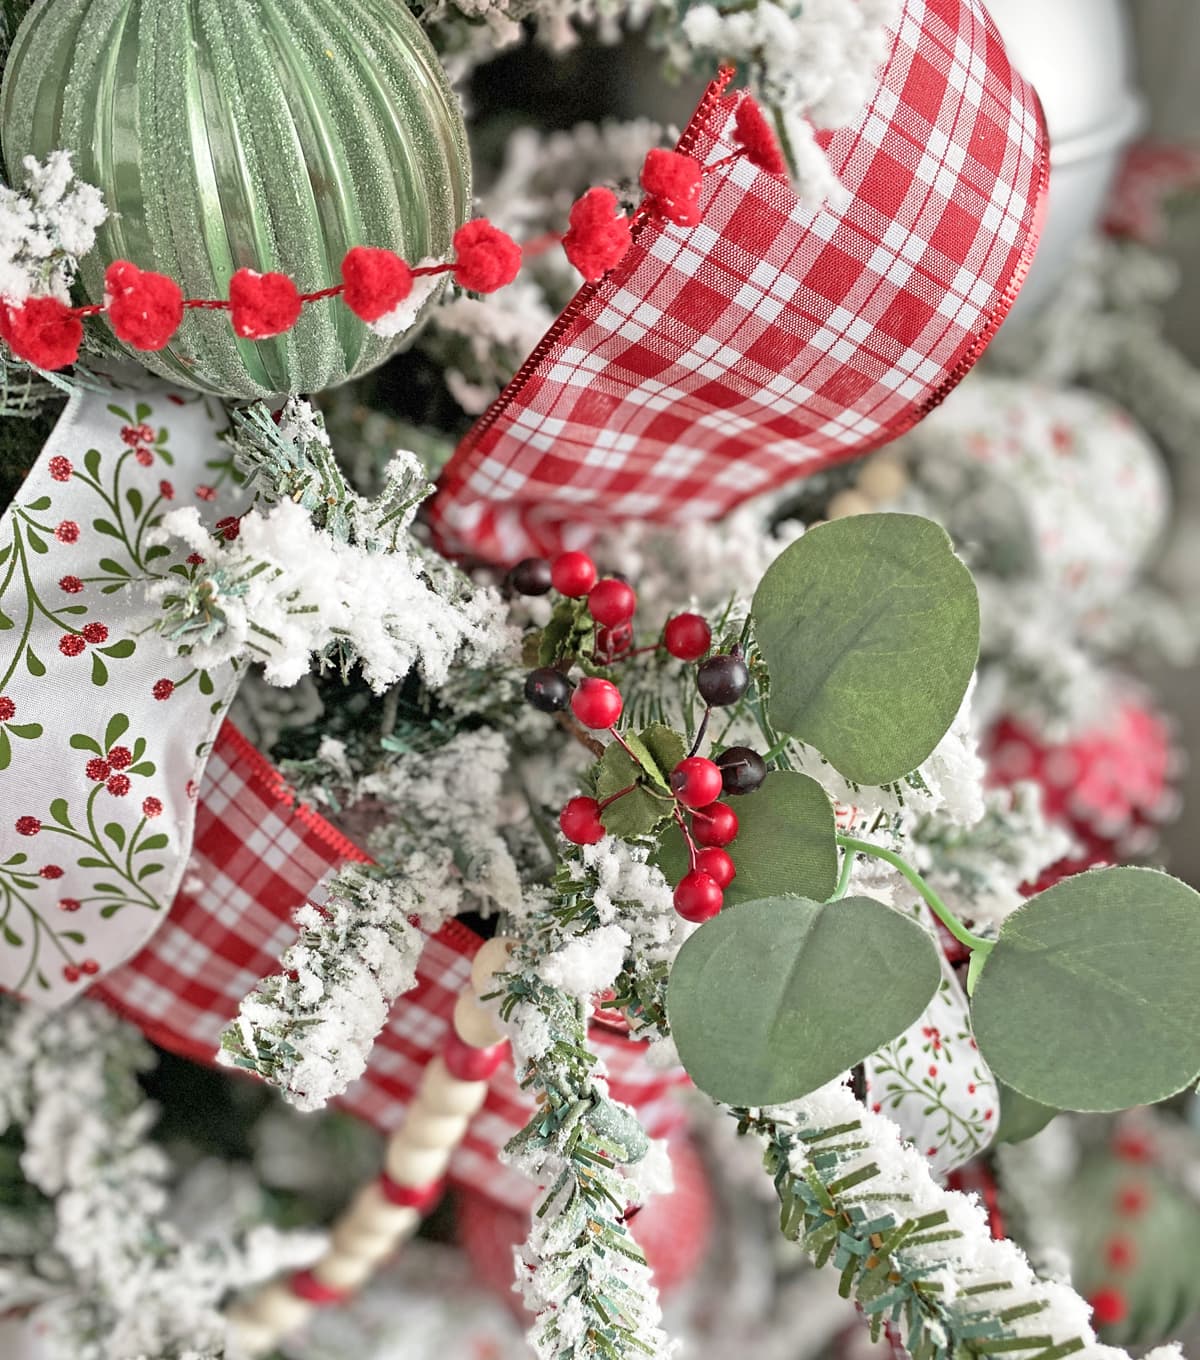
Step 5: Add Natural Elements
I like to add berry sprigs and eucalyptus leaves to my tree, but any natural element will bring your tree to life. One thing I’ve noticed at high-end Christmas boutiques is how they mix greenery. Try adding cedar, magnolia, olive branches, holly, lamb’s ear, maidenhair fern, dusty miller or juniper sprigs to your tree to take it up a notch. Or add twigs or branches or clippings from your yard. Any natural element will add a lot.
Step 6: Finishing Touches
Don’t forget a tree topper and tree skirt/collar. I always wait to turn my lights on until I have everything exactly how I want it and all of the boxes and loose tree flocking cleaned up. It’s my little reward to keep me motivated to finish. LOL.
If you really want to be extra (said with love… we adore extra around here), wrap all the gifts under the tree in coordinating wrapping paper!
More Christmas Tree Decorating Tips
- A color scheme or a strong theme will help the tree look cohesive.
- More is more. Keep adding layers!
- Step back often and look at the tree from different angles to make sure things look balanced.
- Trees don’t have to be expensive. Forage natural materials, make your own ornaments, buy second hand. Gather items slowly over the years. Change out one or two elements instead of replacing everything.
- Add a secondary type of light to your tree. Go big or small… mini fairy lights or giant bulbs add so much interest. I have a DIY hack for globe lights you can try. You might have noticed them in the photos.
Christmas Tree Decorating Video Tutorial
So what do you think? Did this tutorial give you any new ideas you want to try? Now I remember why I have put off writing this post for so many years. This was a lot of information and hard to put into words! I really hope you found it helpful. If you use these instructions to decorate your tree, I’d be tickled pink if you sent me a picture. Email or DM me!
One last note. We have two Christmas trees. This one is upstairs and we have another one downstairs in our family room. As much as I love this beautiful “fancy” tree as the kids like to call it, my favorite by far is our family tree full of handmade ornaments from my grandma (she has made one for me every year since 1994), ornaments we’ve collected in our travels, all of the ornaments my kids have made with their cute little school pictures on them. If you have a hodge podge sentimental tree that fills you with joy, that’s the very best tree of all.
Merry Christmas and happy crafting!
The post How to Decorate Your Christmas Tree Like A Pro appeared first on The Craft Patch.